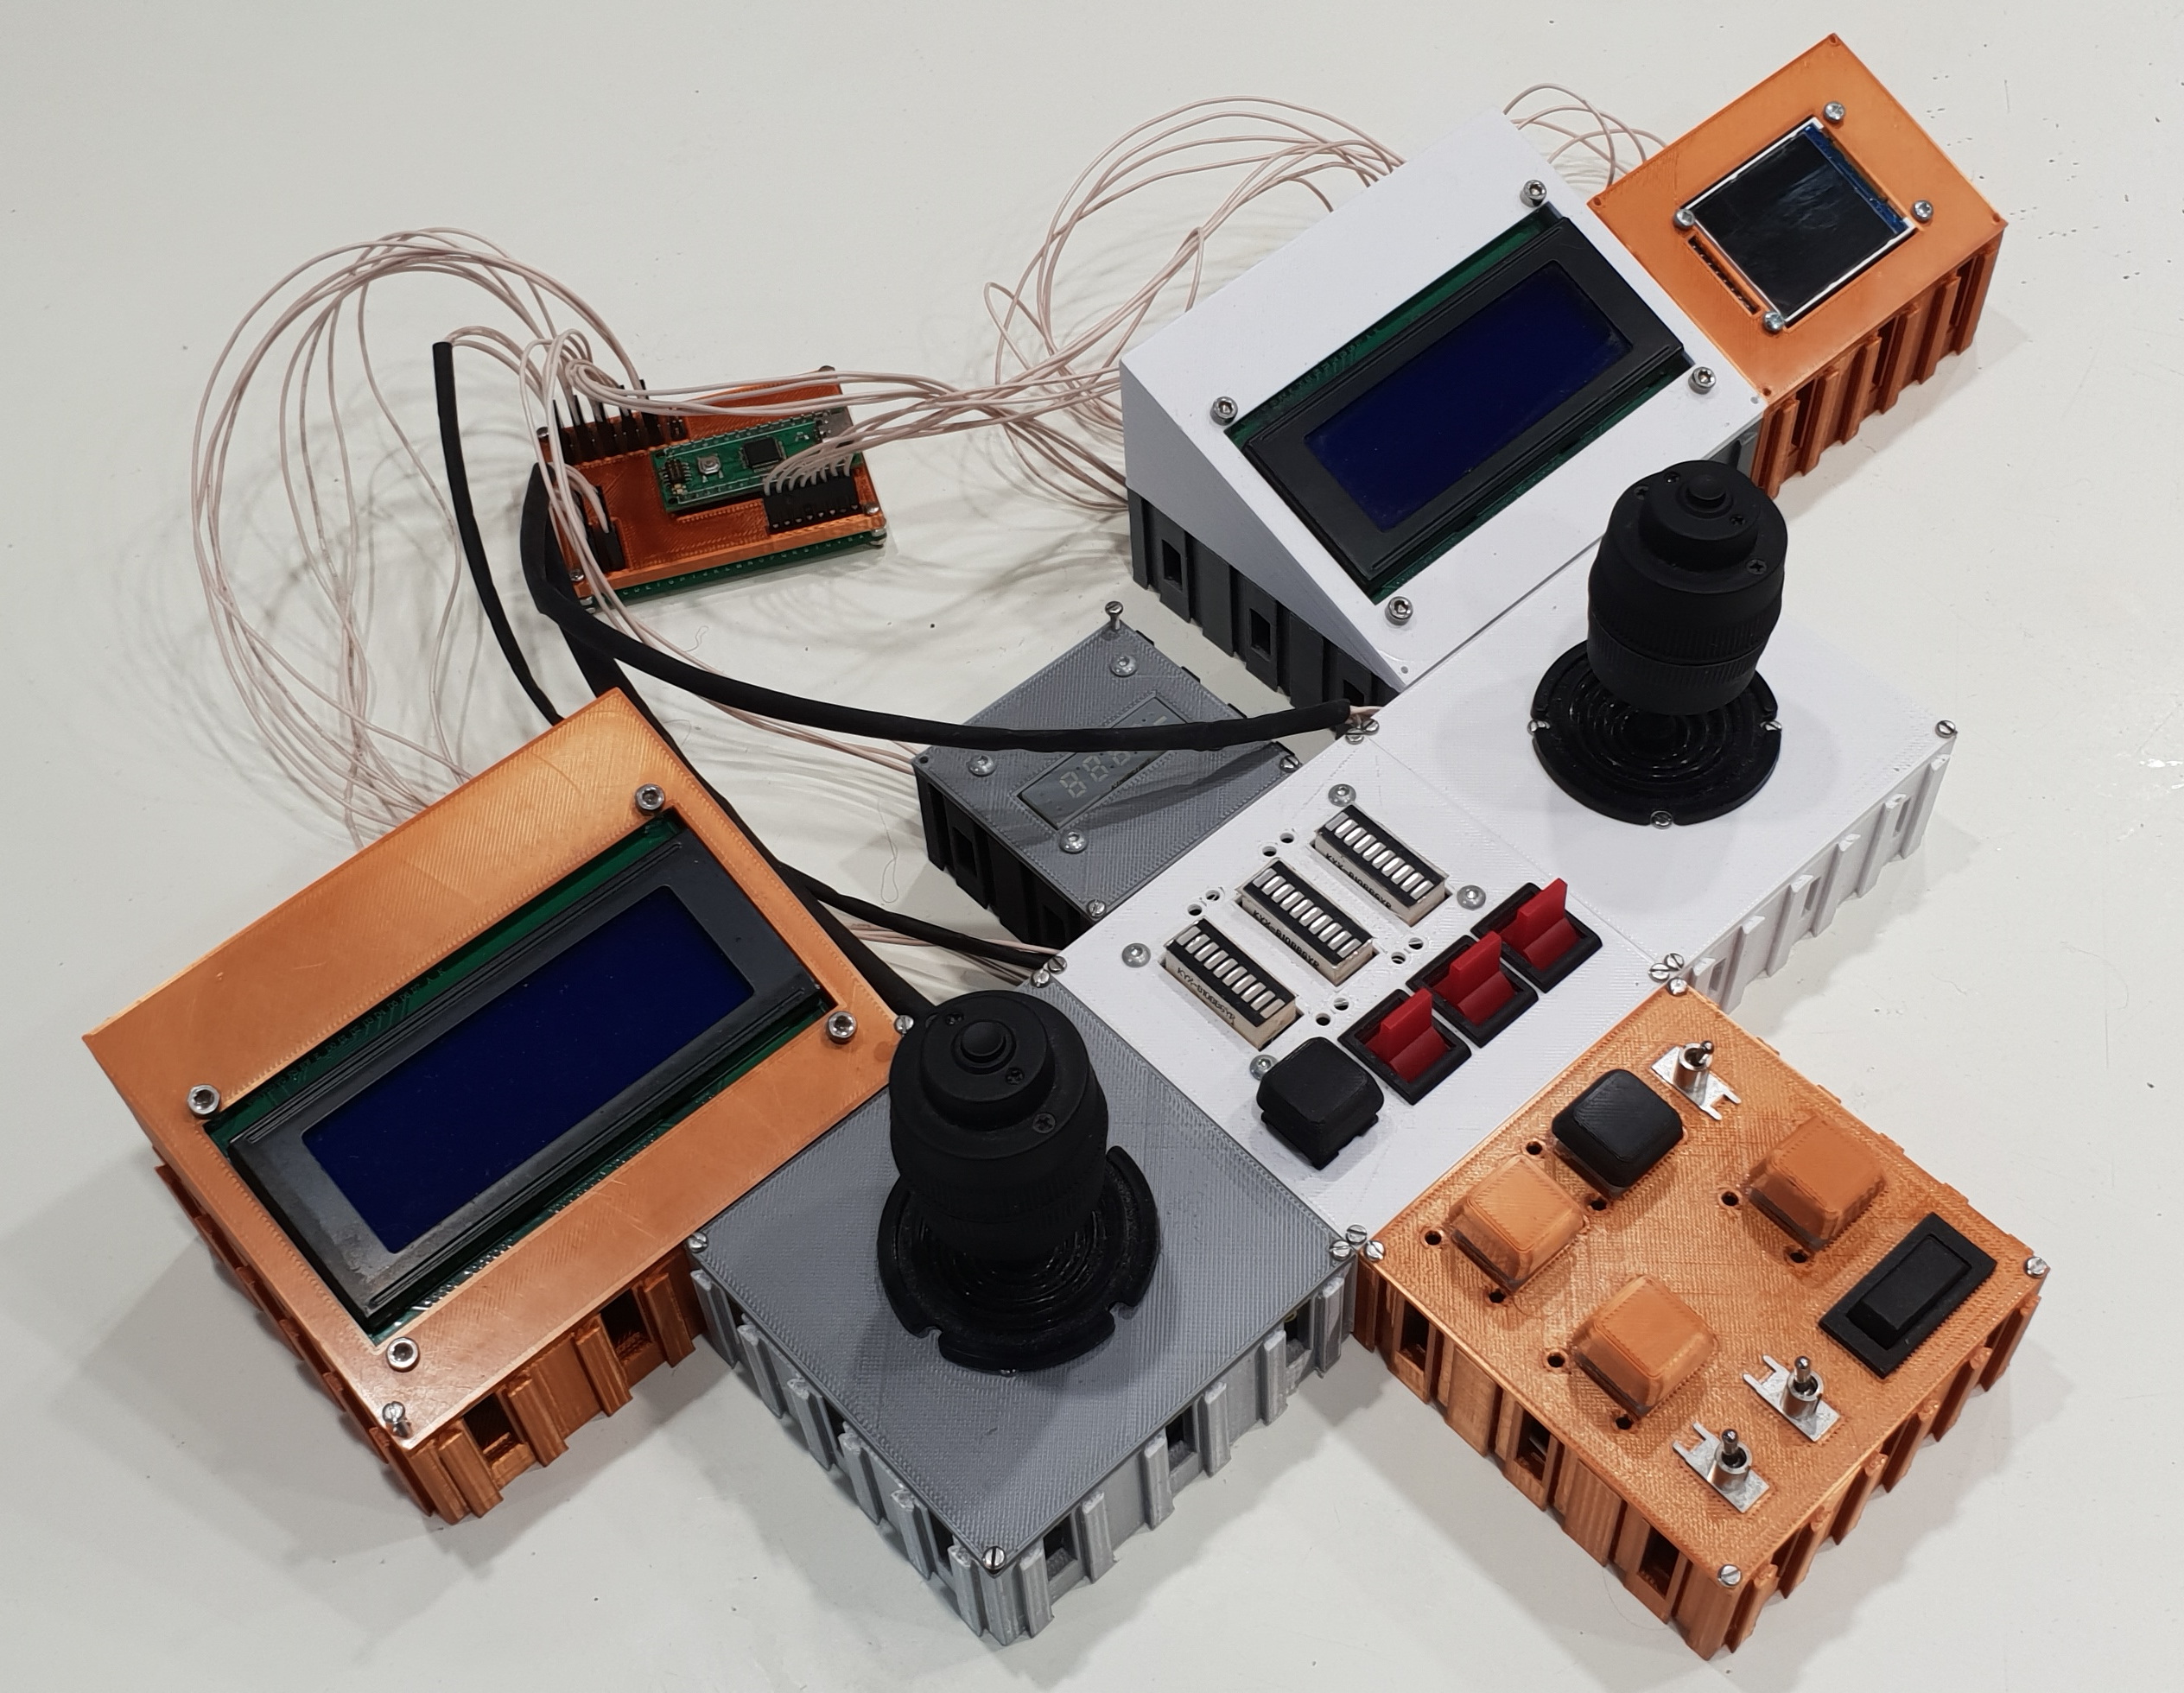
A proof-of-concept custom controller and hardware HUD for Hardspace Shipbreaker
My original reason for getting into hardware dev was the custom keyboard scene, and while I've largely moved beyond that now, I still like messing around with crazy custom input (and output) devices as game controllers. When I saw the game Hardspace: Shipbreaker, my first thought was that its industrial setting made it perfect for some kind of new project. I liked the idea even more when I saw that the game included ascend/descend and roll left/right in its controls - that isn't super common, and I thought that it would be interesting to see what I could do to implement three-axis controls rather than traditional two-axis thumbsticks.
Feature Highlights (Click title to navigate video):
- Basic Movement
Demonstrating the basic movement controls covering all six axes plus brake button in central panel
- Comms/Subtitle Display
Showing the hardware comms display capable of showing in-game messages from NPCs including their portraits
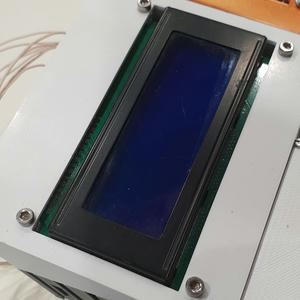
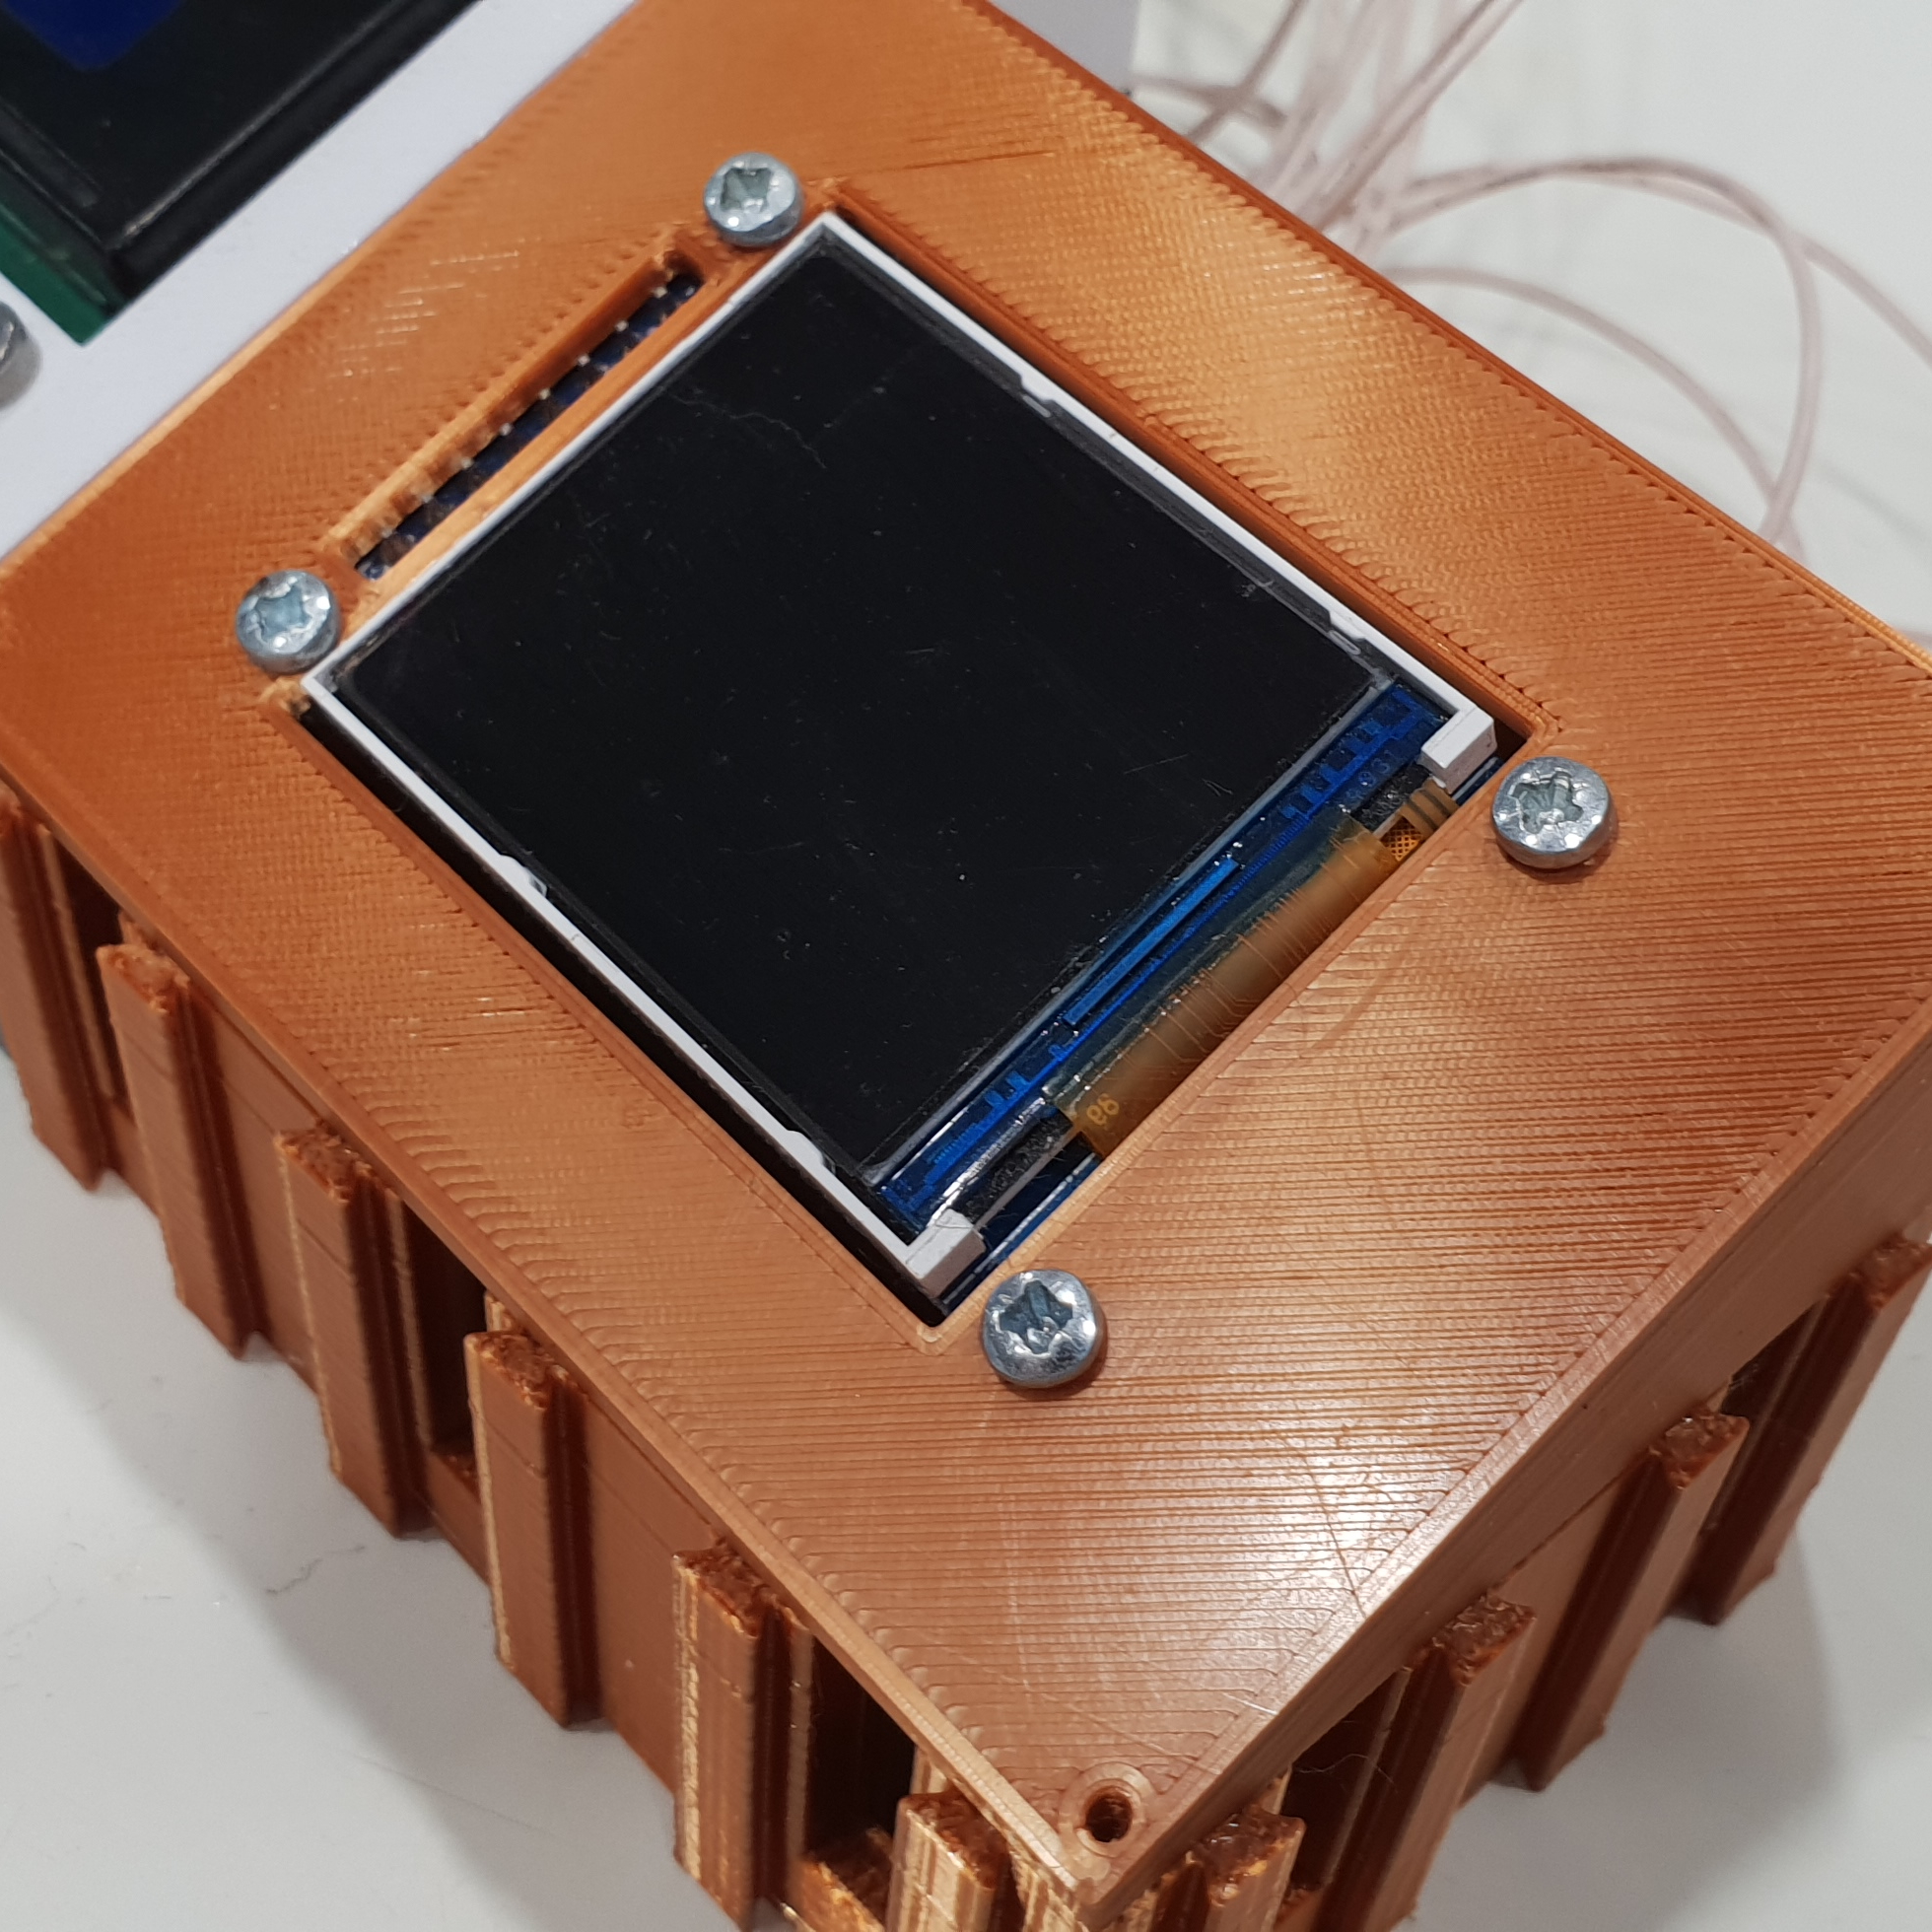
- Object Info Display
(Sorry for the poor contrast, LCDs are hard to film) Demo of Object Info Display showing the currently focused item, its value and processing type, weight and cut level
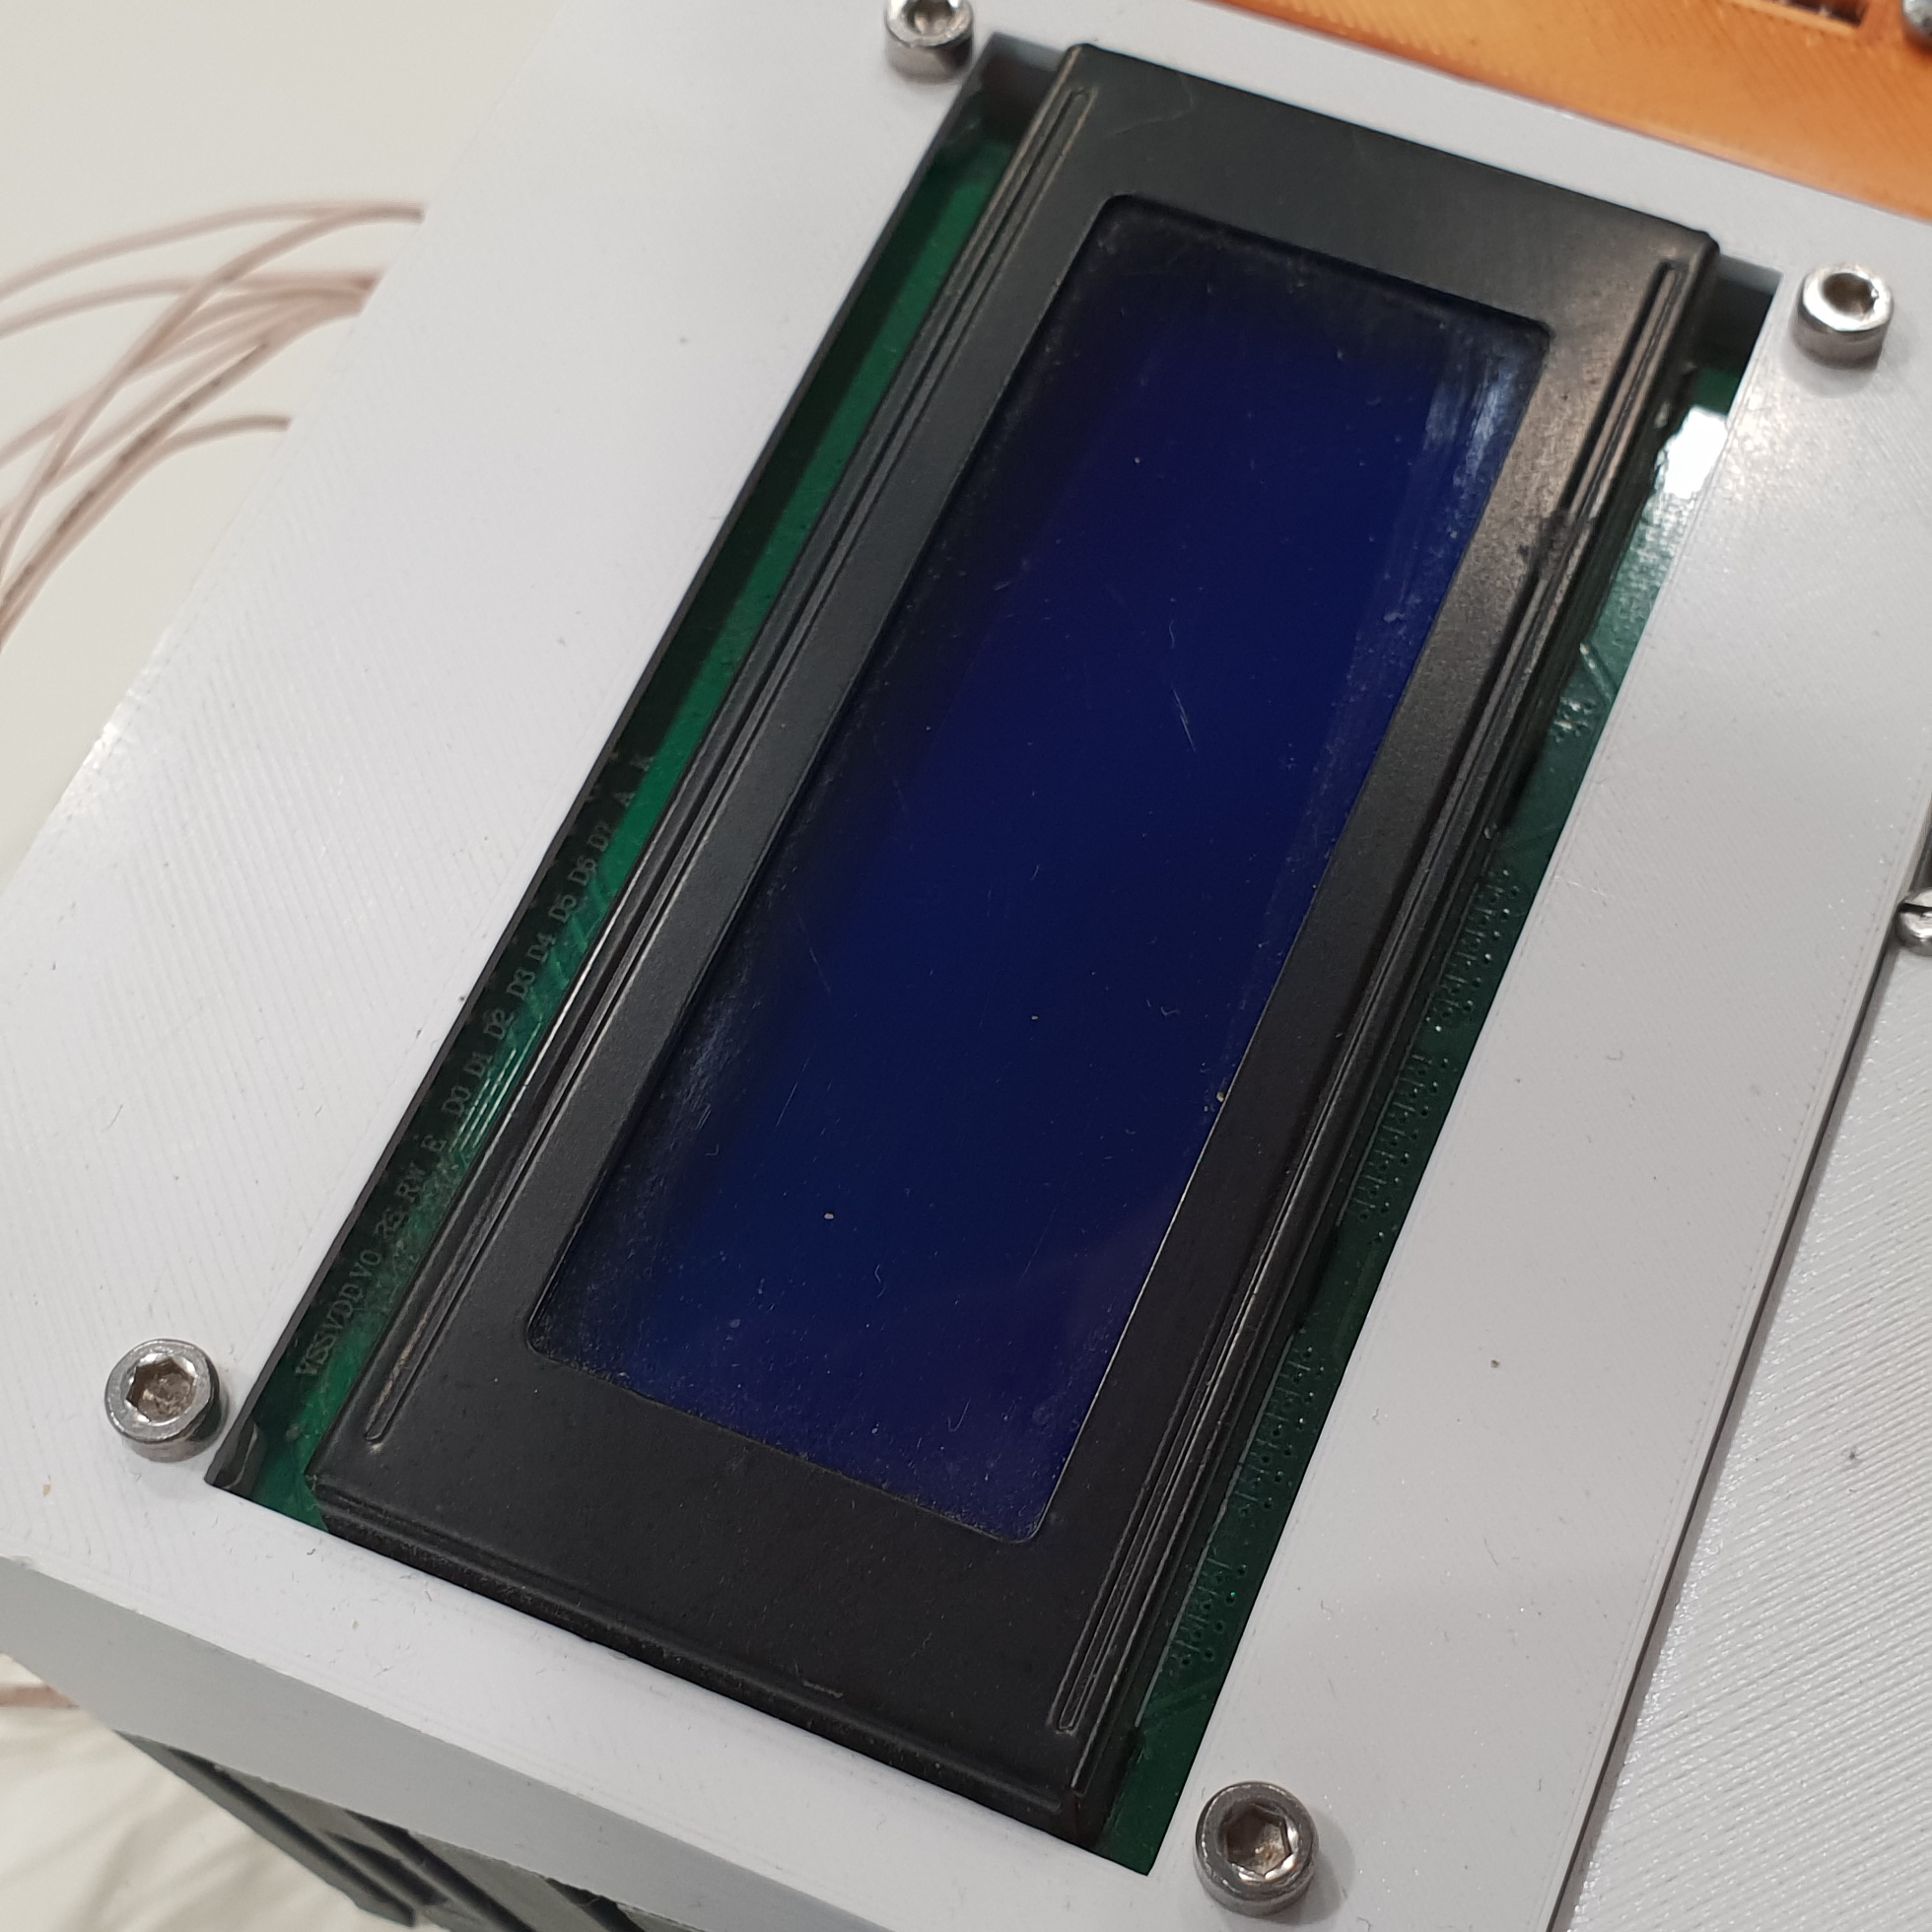
- Ship Status Display
Second LCD Panel showing Ship Name, Hazard level, Pressurization state (little P icon top right hand corner, with +- on the left indicating changes), Location inside the Ship, Player Speed and Tether Count
- Ship Salvage Progress
Second LCD Panel also contains a Salvage Progress Bar - Bar grows on left showing salvage progress, bar grows from right showing how much of the ship's value has been destroyed, and the total value salvaged
- Scanning and Tool Changes
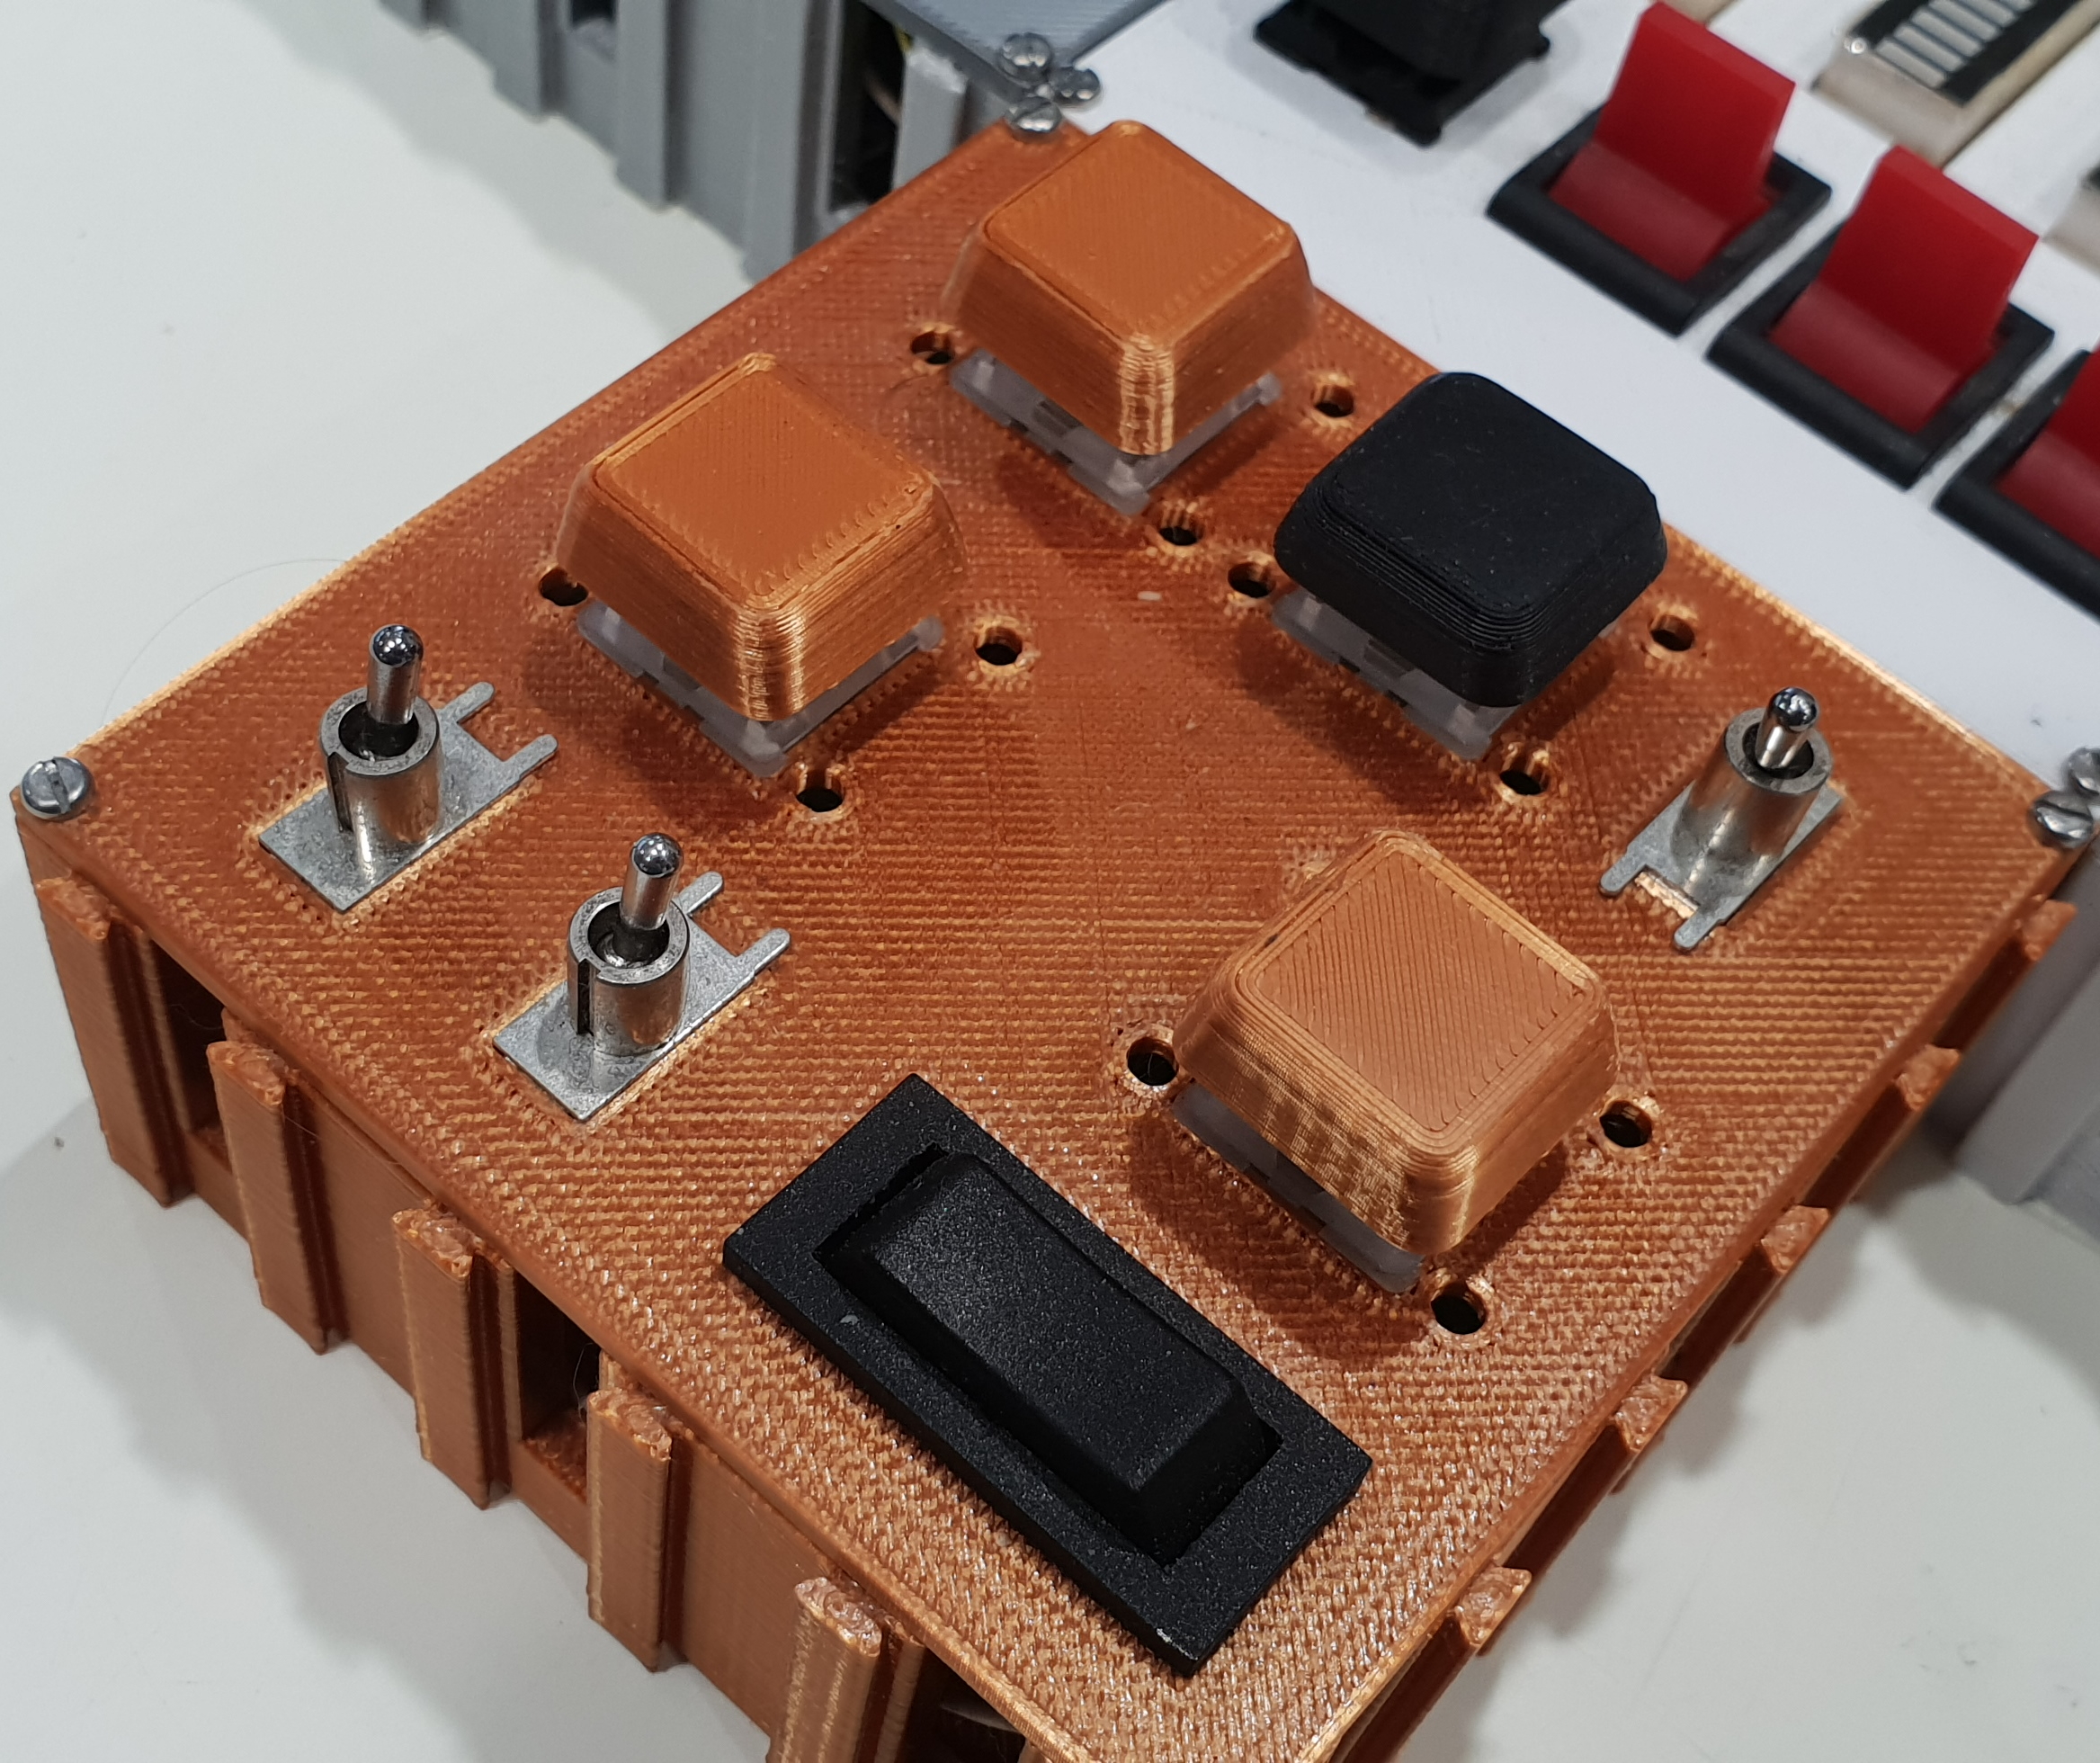
(Backlight battery ran out during this section, sorry) Toggle switch in the central panel enables/disables scanner view, thumb switch on left joy stick brings up tool change menu, thumbstick on right uses selected tool
- Subtool switching and angle selection
Switches in the central panel control selection of subtool and cutting angle
- In-game key rebinding support
Modifications to Incontrol and game logic allow custom controller to be remapped in-game like a normal controller
Links to more detailed breakdowns of most of these features are included at the bottom of this post.
I've been writing microcontroller firmware for nearly 10 years now, but expediency has always dictated the use of external frameworks and libraries for getting things done in a hurry, whether that be the STM32 SPL or HAL, Arduino framework, or even NodeMCU's embedded Lua, and I've wanted to do things completely from scratch as a learning exercise if nothing else.
As a result, this project's controller was a completely custom STM32L073CZT6-based board that I designed and fabbed, and then hand-assembled, and the firmware uses no external hardware abstraction libraries.
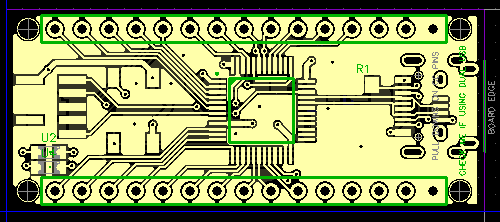
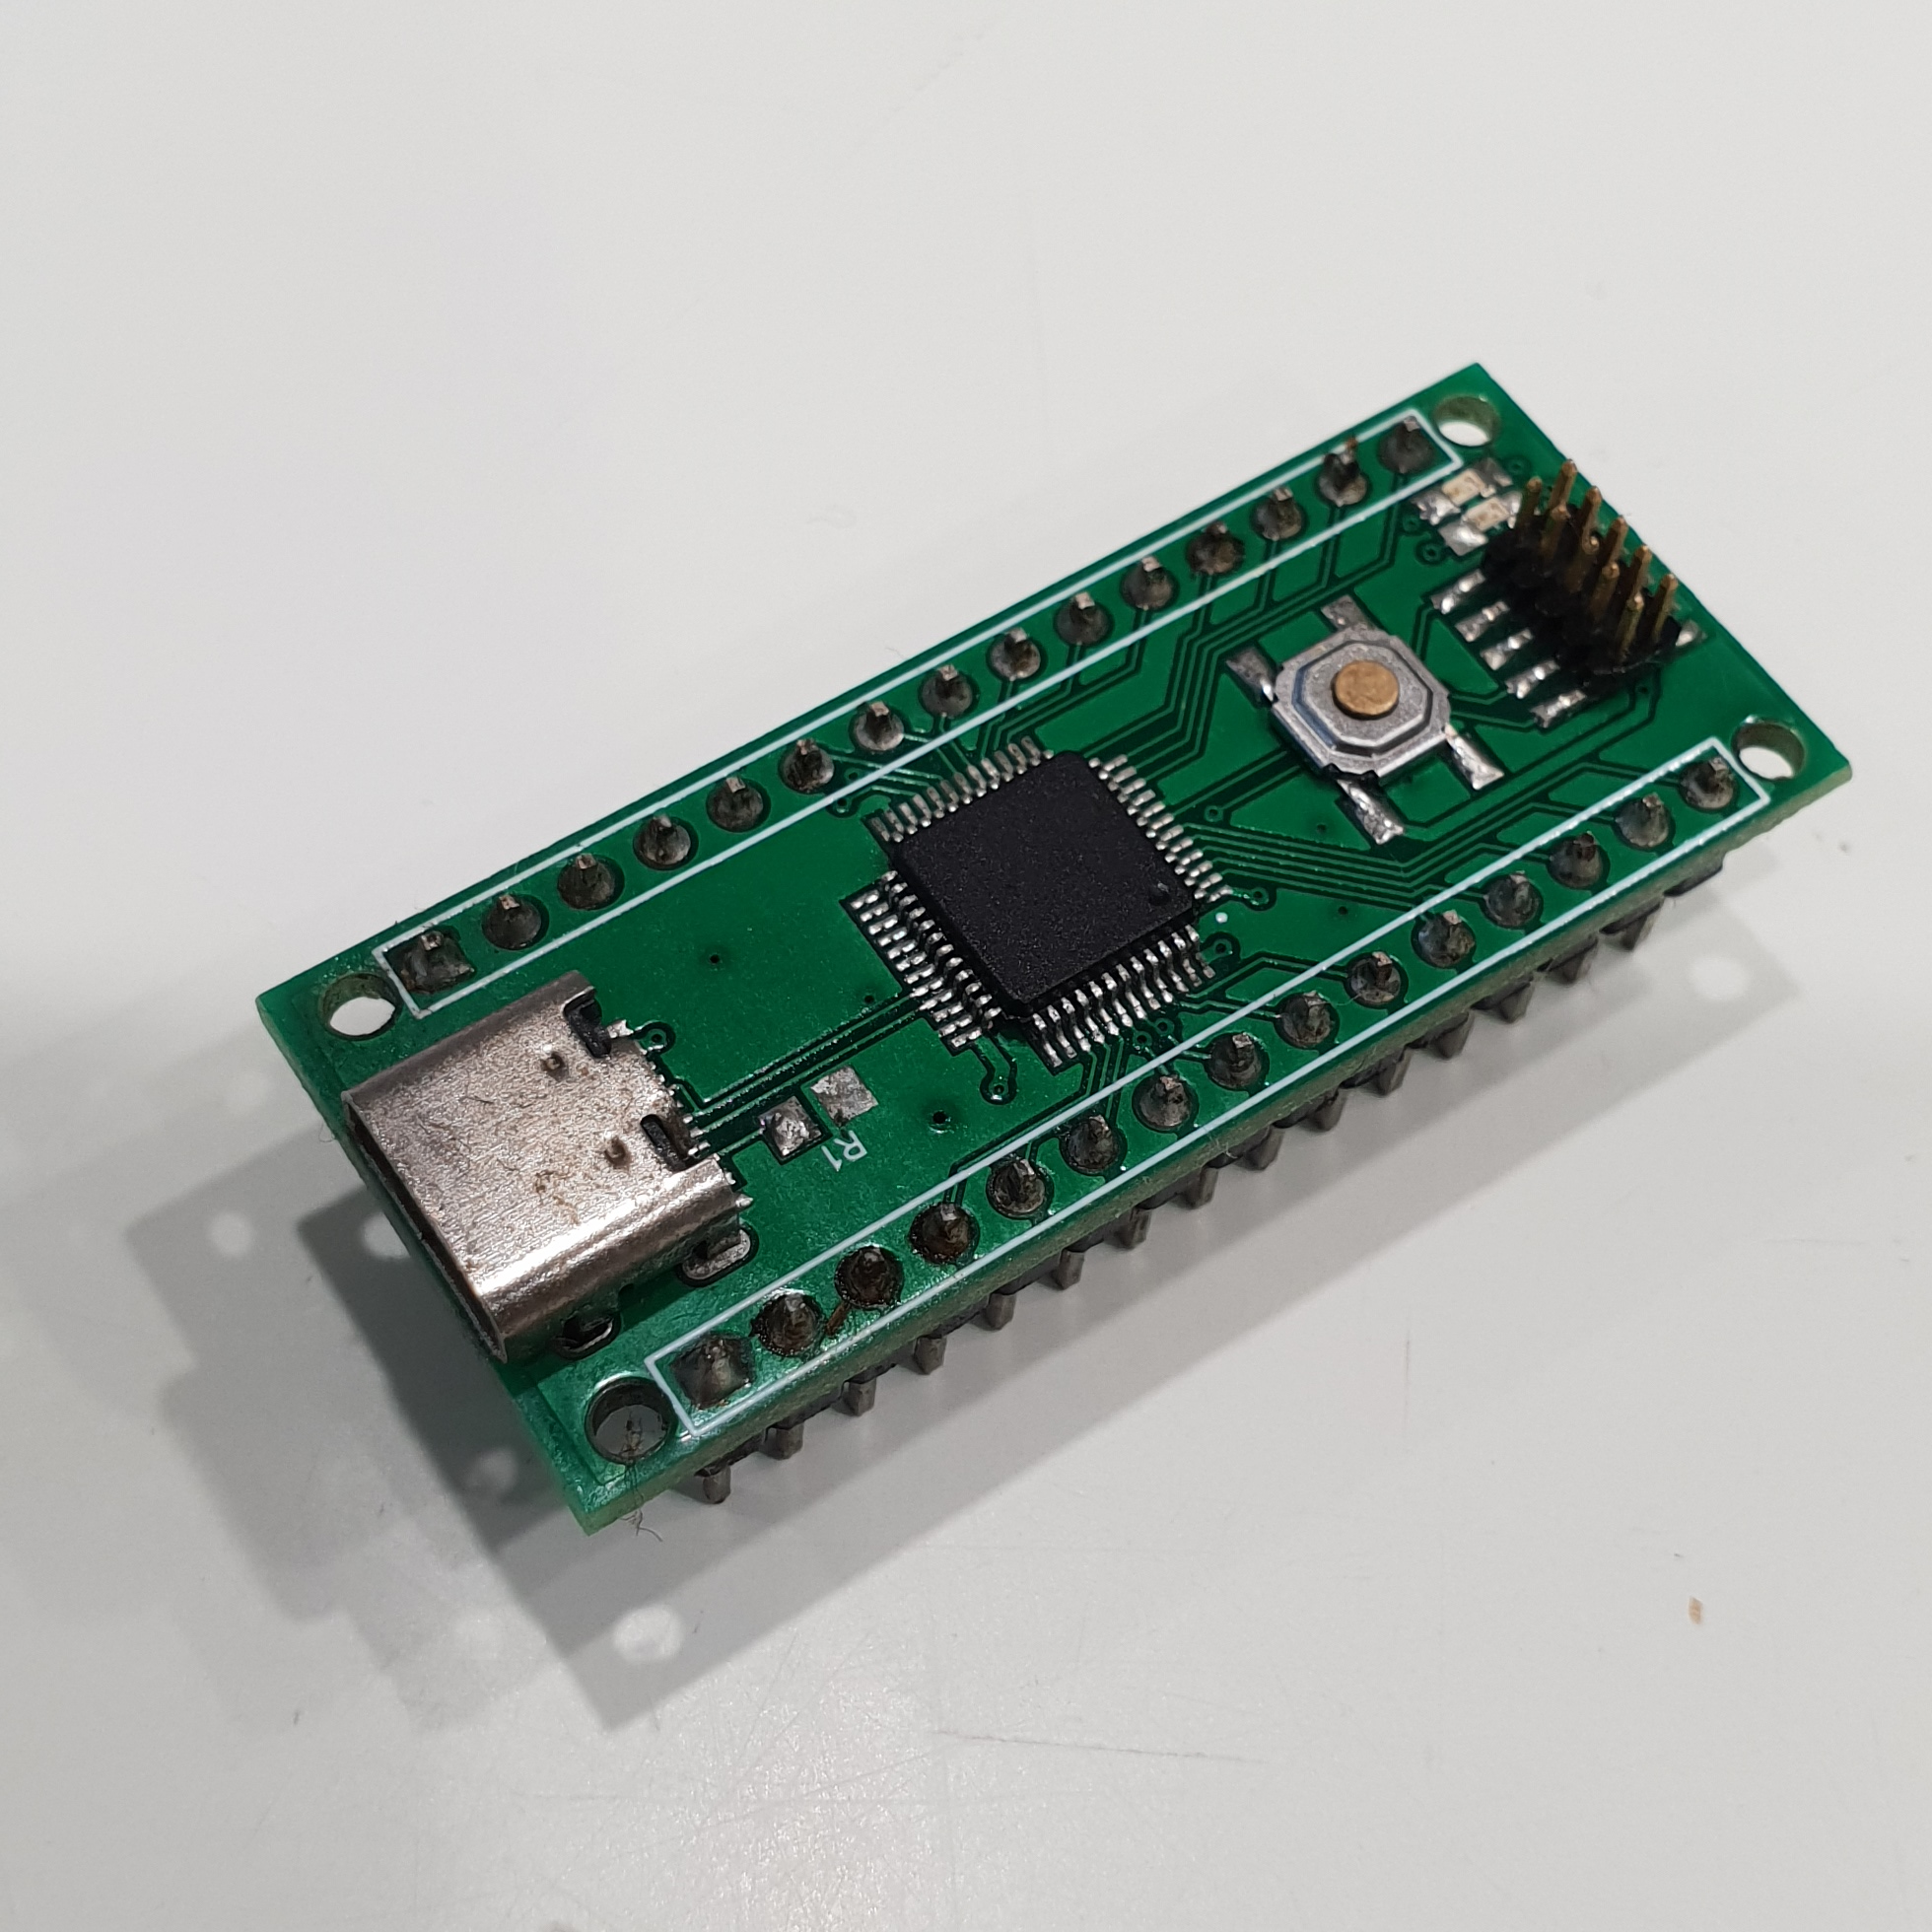
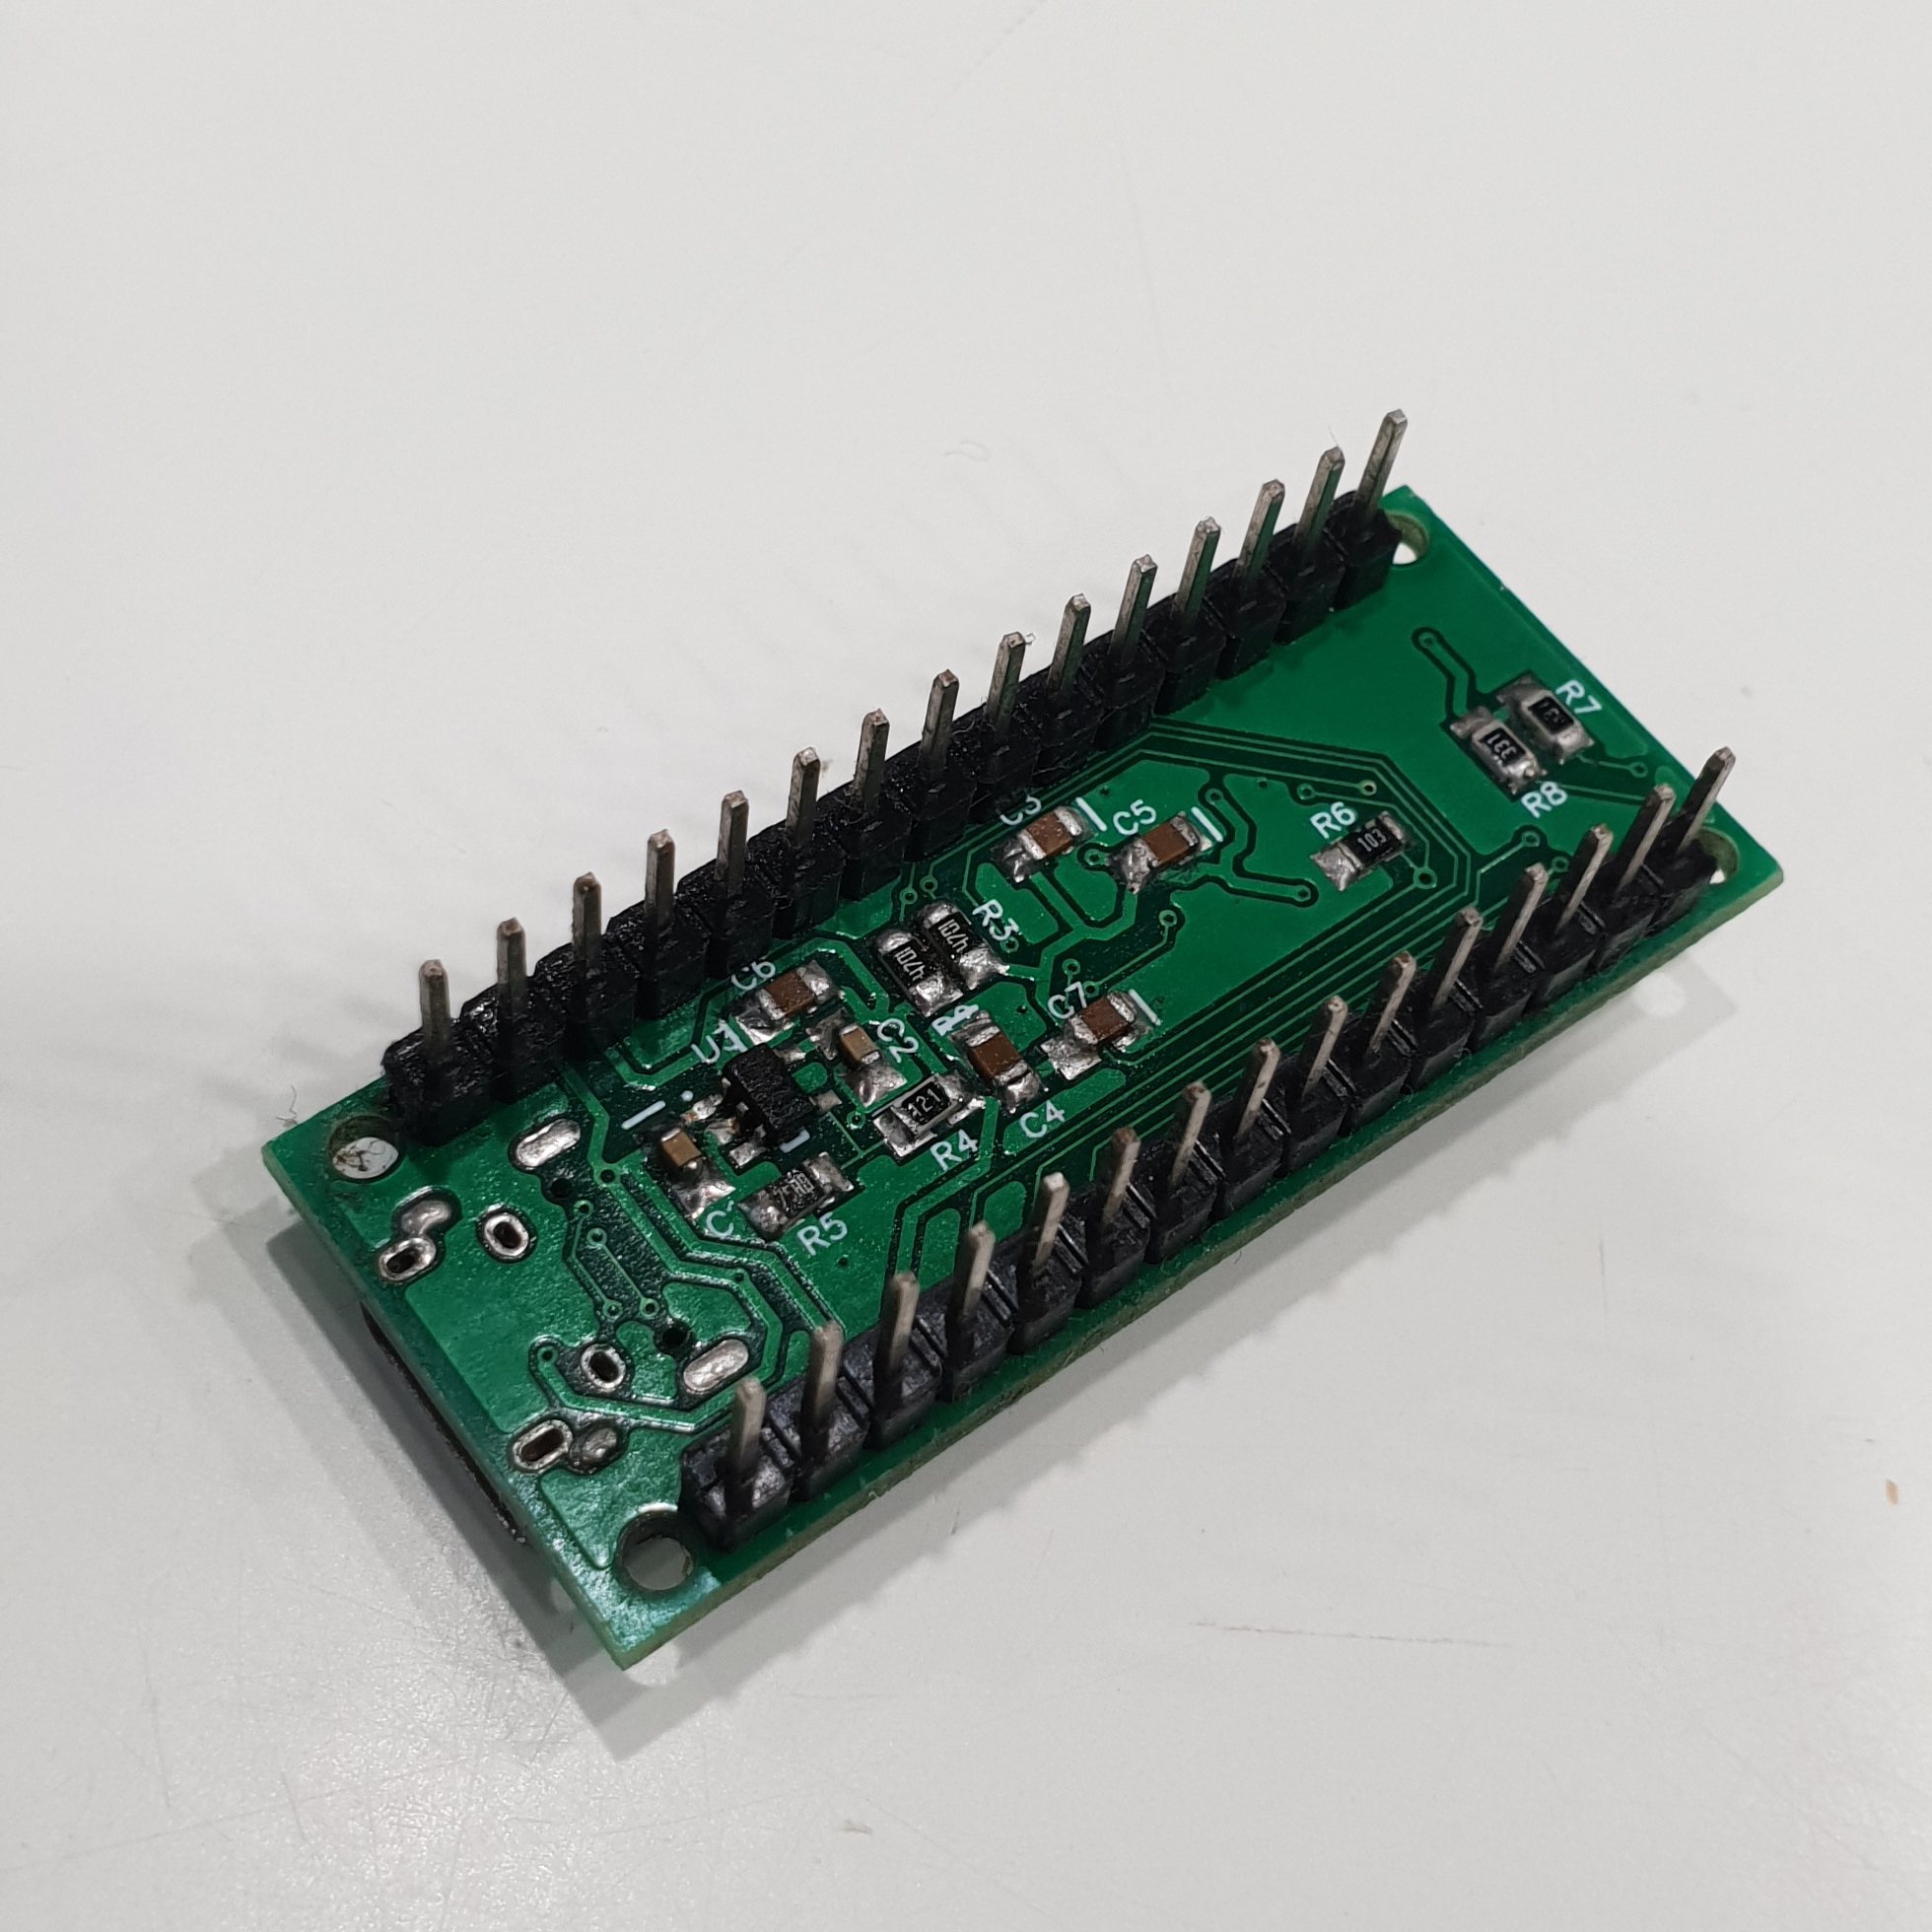
The startup code is pure C++, no C or assembly, the register definitions are C++ templates code-generated from the patched SVD files generated by the STM32-rs project, and all the peripheral drivers are also implemented in C++ from scratch. This includes something that's been a long-term goal of mine: a from-scratch implementation of a baremetal USB device stack in C++ supporting the STM32L USB peripheral (aka the Synopsys USB IP) with a USB HID class layer implemented over the top of that.
This project uses the following additional hardware:
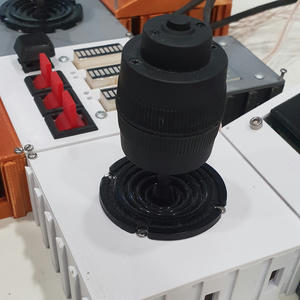
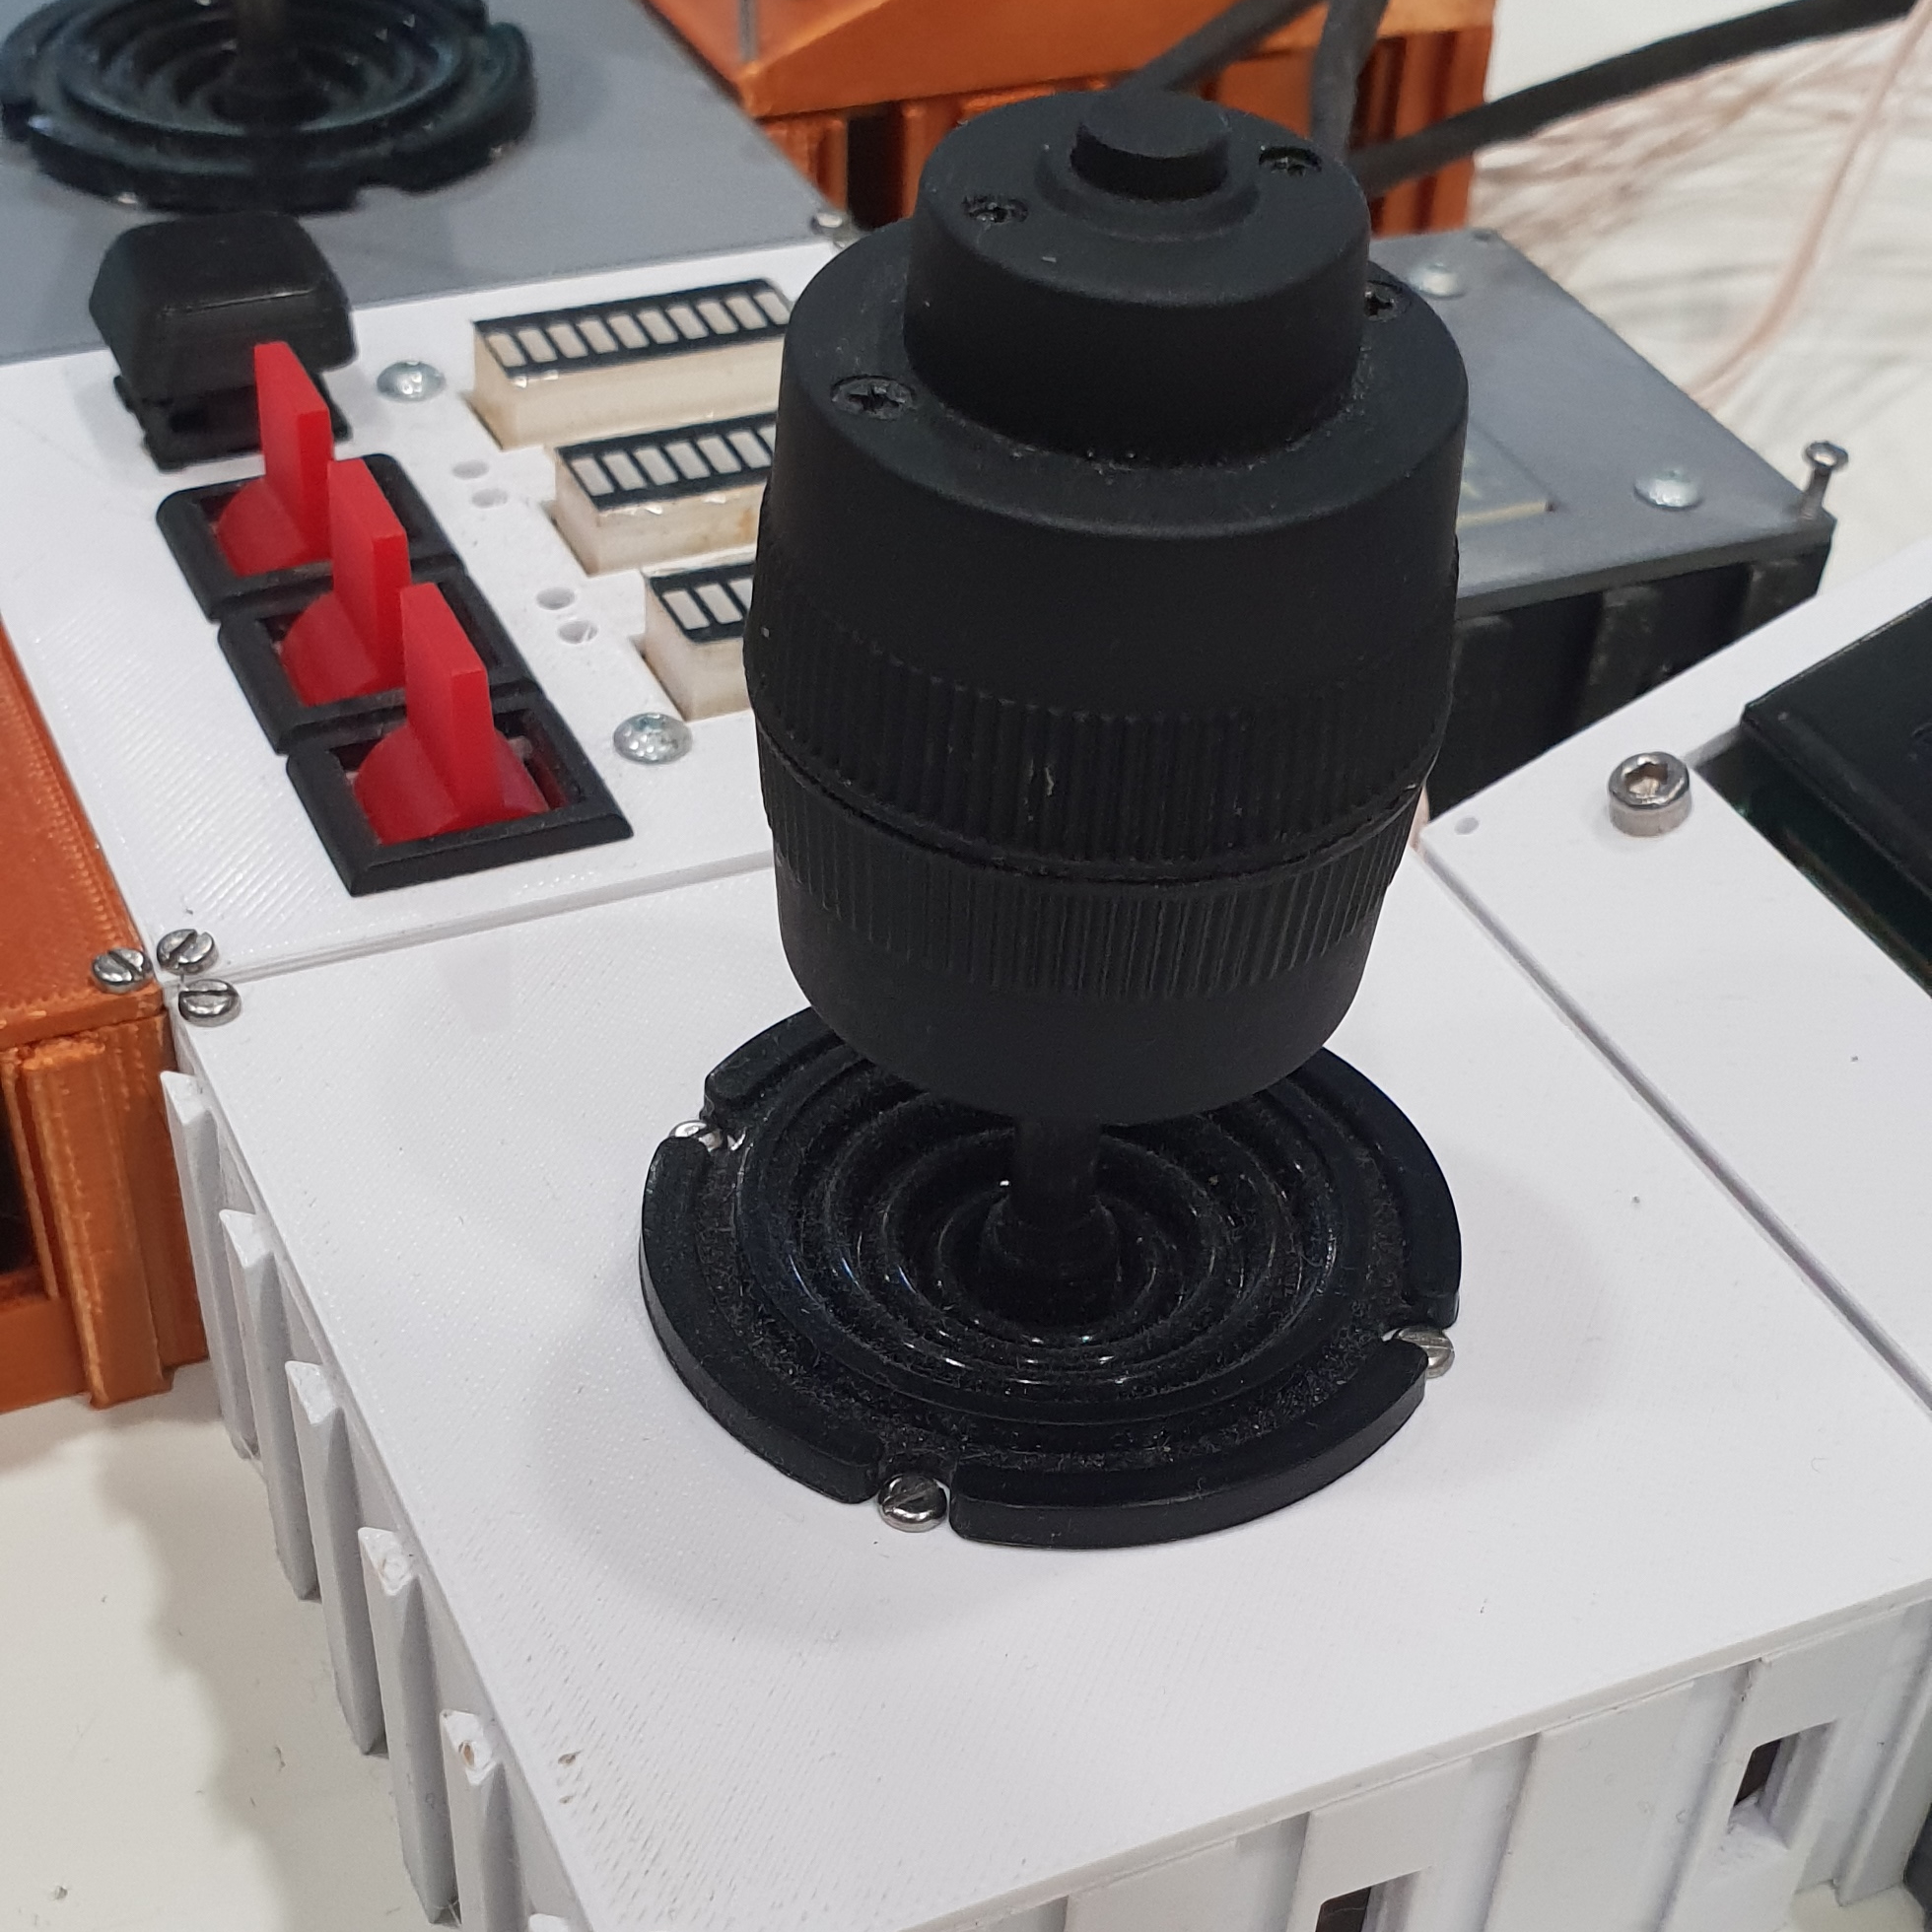
- off-the-shelf PTZ joysticks as three-axis controller inputs:
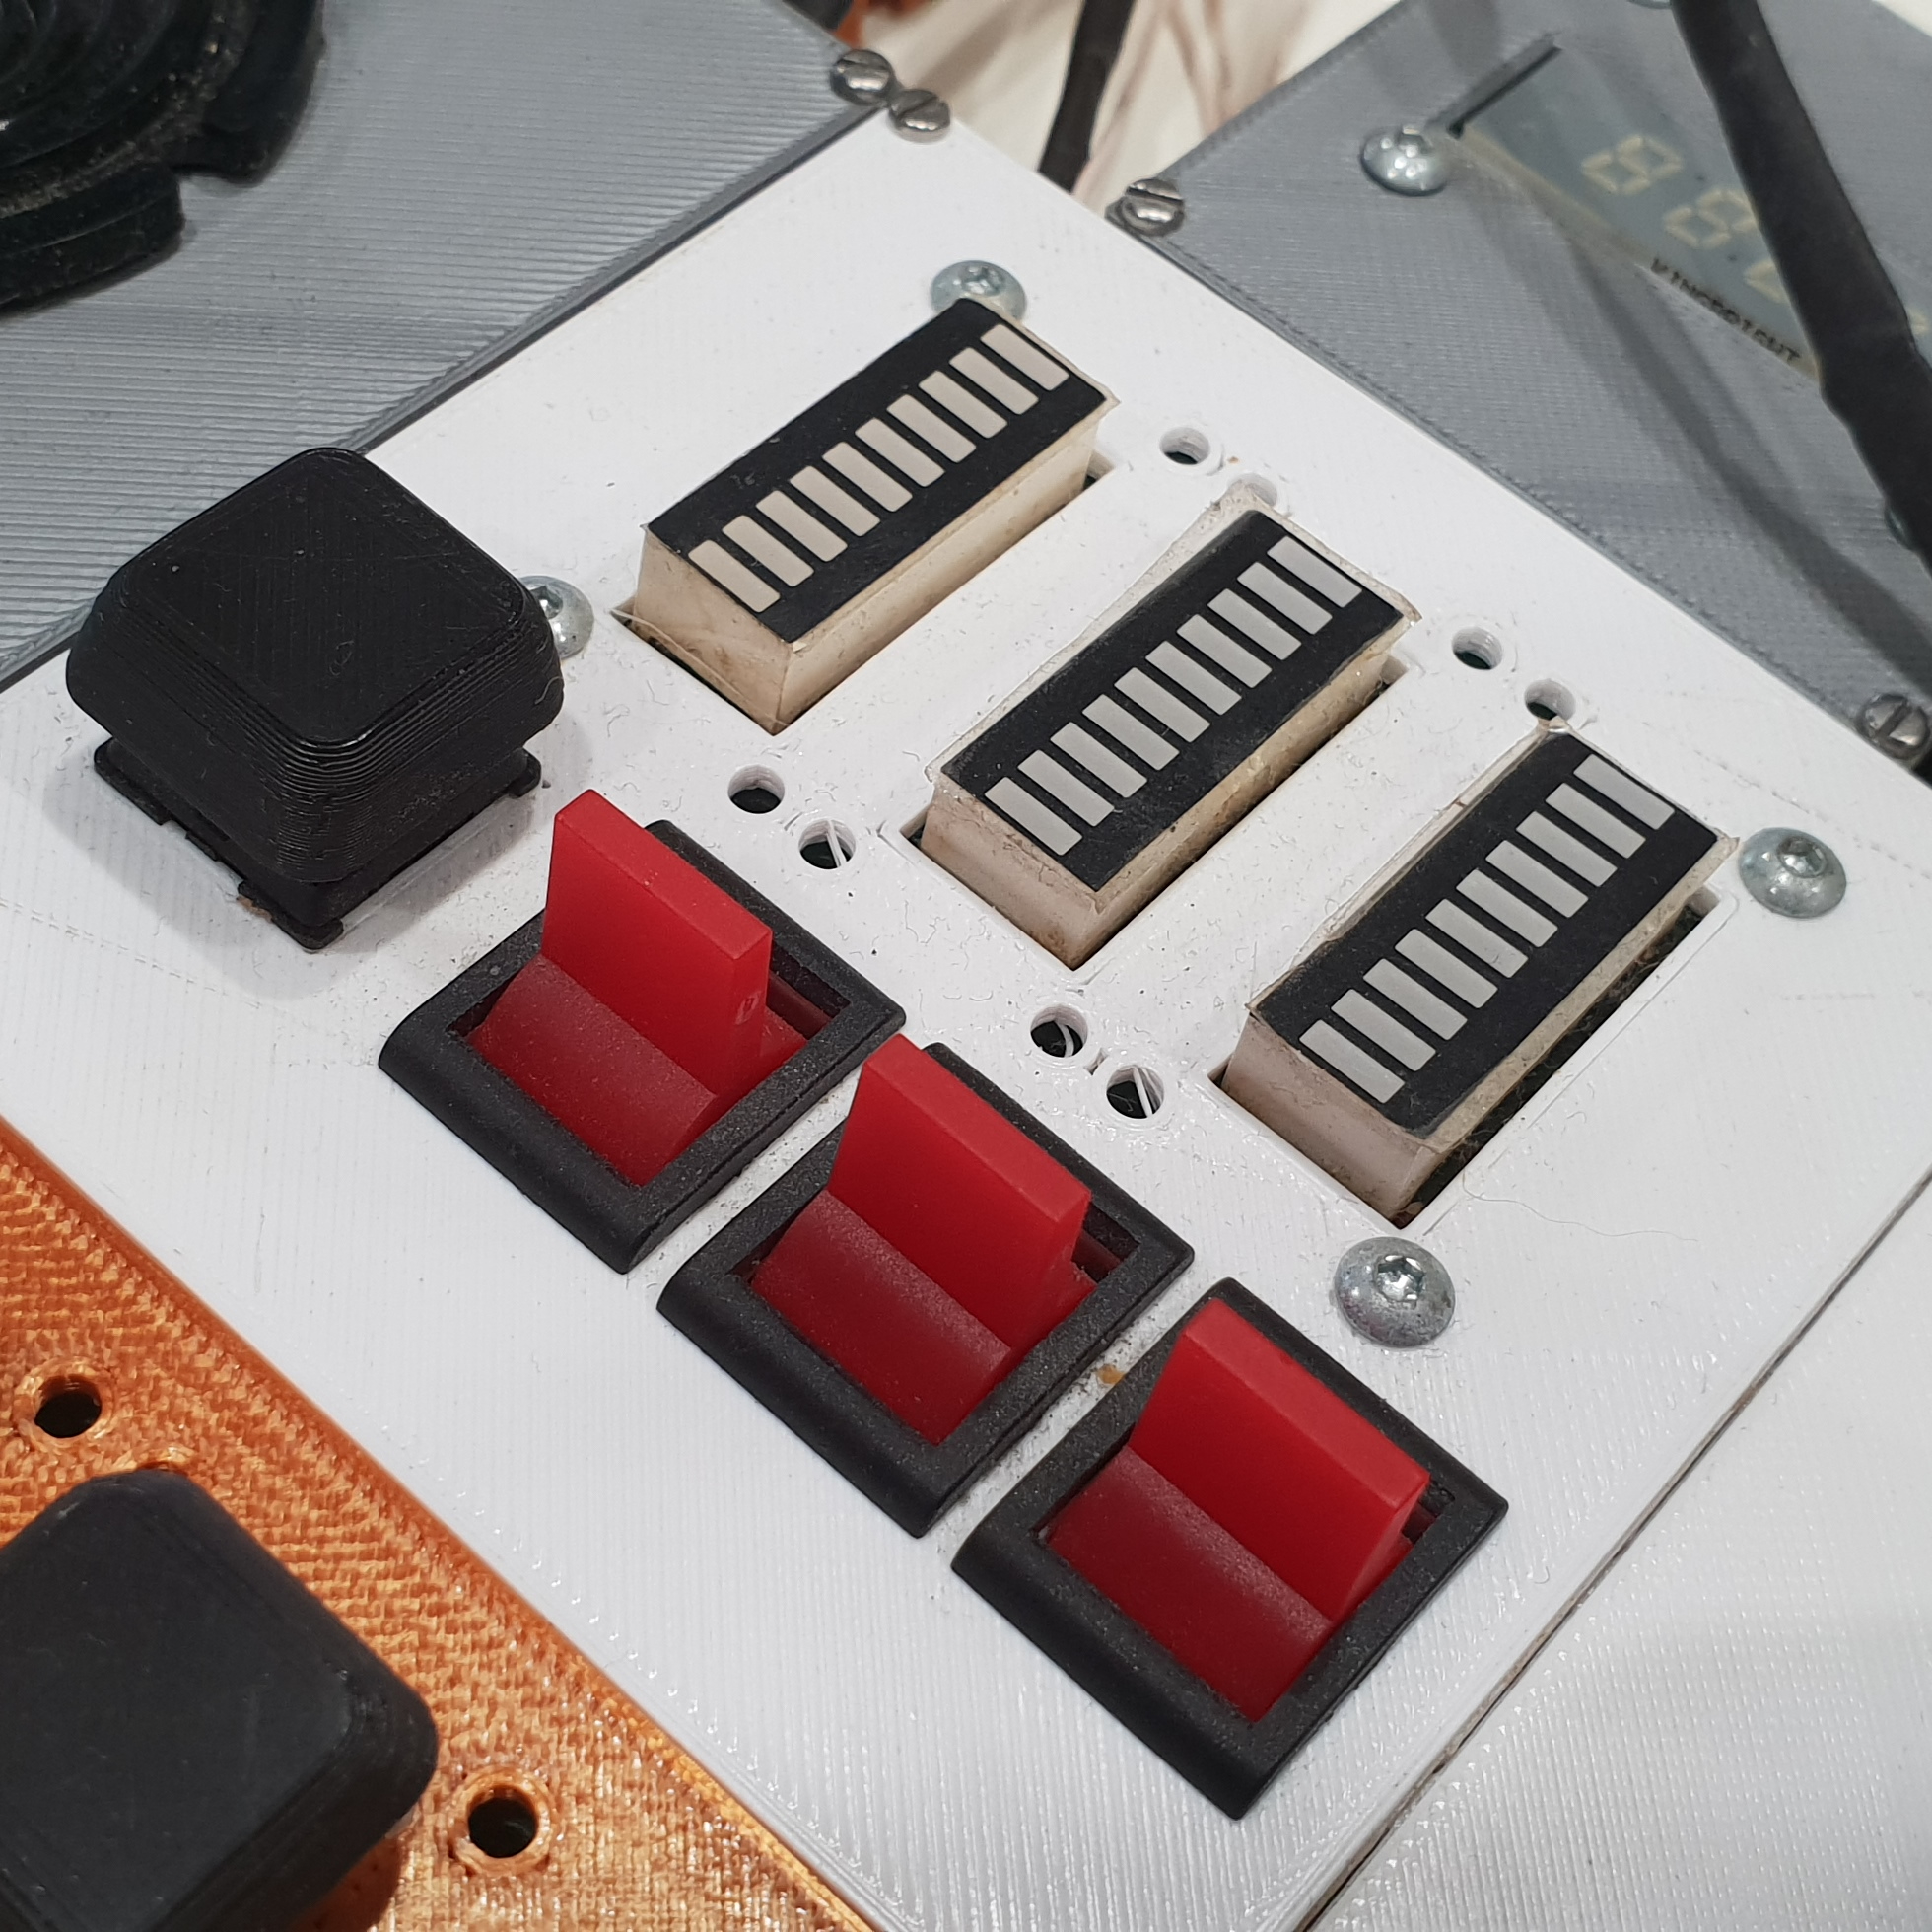
- bar graphs:
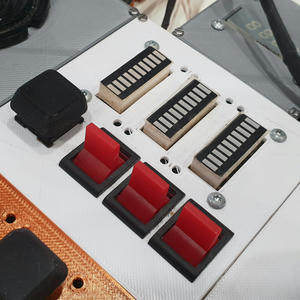
- seven segment display:

- a pair of I2C-based 20x4 LCD character displays:
- a 128x160 SPI TFT Screen:

- in addition to a number of other buttons and switches:


This allows the following feature set:
- Most of the primary game controls are supported
- Player vital signs are shown on bar graphs
- Shift timer is displayed on clock
- Relevant information about salvage status, speed, item value and type are all displayed
- Messages from NPCs are displayed on the physical HUD
In theory, the game could be played with this controller in 'glass mode', aka with all HUD elements turned off and just the physical HUD instead.
All the components are built into my own custom-developed modular housings that lock together, yet remain modular enough for me to re-use on another project later. Given the current situation with chip pricing, this is more important than ever - I paid approx 3.30USD for the microcontroller in this design when I bought them, but the cheapest authorized distributor price for them is currently nearly 3 times that in small quantities, and many other parts have also increased in price.
In addition to the firmware itself, there was extensive modification required to the game's input handling library and the game logic in order to treat the controller as a first-class citizen, to support input remapping in-game, and to pull data from the game at runtime to transmit back to the controller.
- Custom build of InControl (Unity input device middleware) with a new Device type and new DeviceManager type that uses HIDSharp to support arbitrary USB (HID) devices defined in json files in the game's folder
- Custom (re)build of BBI.Unity.Game assembly, with patches to input binding code to support InControl during input binding and new event handlers to intercept game events and transmit information to the controller via an injected ComponentSystem
- Custom native DLL loaded by modded game assembly, containing from-scratch SIMD (AVX2) implementation of the 'Fast Pairwise Nearest Neighbour' algorithm for color reduction, used when transmitting subtitle portraits to the controller
Will I actually finish the game with this controller? Probably not - the sticks are not particularly ergonomic, and the modular/reusable enclosures I'm using means that nicer placement of the other buttons wasn't really possible. It definitely has the industrial feel I wanted to go for, but I suspect I'd need to make a lot of changes to make the setup comfortable for long-term use.
Click through below to see a MUCH more detailed breakdown of the development process:
I've tried to cover the most significant elements here, but if there's other parts you'd like to know more about, or any questions, feel free to contact me by any method on the 'about' page on this site.
Implementation breakdown pt 1: Hardware selection
Implementation breakdown pt 2: 20x4 LCD implementation
Implementation breakdown pt 3: PTZ joysticks
Implementation breakdown pt 4: Switches and buttons and bar graphs, oh my